Monday, April 4, 2011

Cantastic Crafts and Buckets of Awesome

The Man decided that this weekend was the weekend to clean out the garage. That's pretty much his domain, it's where the tools and chemicals and other boring (to me) whatnot hangs out. I was enlisted to help determine what  should be kept, what could be reused/repurposed, and what needed to be tossed.

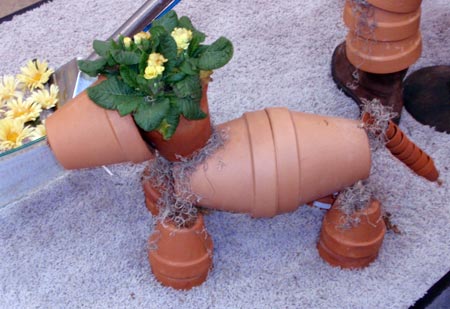
In one corner of the garage are built-in shelves which until this weekend housed every can of paint ever used in this house by every owner ever. Maybe. The oldest date we actually saw was 1992, but still, there was an insane amount of paint. I saw all those cans & couldn't stomach throwing them out. This is where my mind went:

from FunInTheMaking


I'm probably going to make a few of these with stars & suns for our patio. They'll be cute for BBQ decorations.


And look at all these ideas from the ReUse District!

So I spent a good part of yesterday pouring paint from 1 gallon cans into a big 5 gallon bucket that only had a couple of inches of paint in it. All those remnants filled the bucket, and we still had 12-15 cans left. So. Much. Waste!

I got a little giddy from the paint fumes and stirred the bucket while I poured, having fun seeing the color combos. I wish I had pictures, but I rarely think of things as bloggertunities until after the fact. 

I didn't want to hazmat 5 gallons of paint if we didn't have to, so I posted an ad to the "free stuff" section of craigslist. It read: 
After living in our home for nearly a year, we decided it was time for an archeological exploration of the storage space in the garage. We unearthed every insane color the previous owners had painted this house and decided to combine them all into one five gallon bucket of paint. Dozens of remnants combined into a new creation.

What color is the paint in this five gallon bucket of pure awesome? A new, unheard of, never before named hue. YOU get to name the shade! No more being constrained by the wannabe greeting card writers who name the paints at Home Depot! To whet your appetite: imagine you had a chocolate milkshake and a strawberry milkshake. Then imagine you poured them into a bowl, stirred them, and let them sit for a week or so. Voila!

Come and get it, free to the first taker. It's heavy (the bucket is filled nearly to the brim). Paint your horse, the undersides of your tables, the inside of your vomitorium (just to set the mood).


I thought it was funny. Within the hour we had someone come by, look at the 5+ gallons of pinkish-brownish slop, and take it to paint a room in their house. We had another couple come by a few minutes later & they were disappointed it was gone. So weird. 

Moral: Throw nothing away. Someone out there will want it and use it. Freecycle or Craigslist everything. And a little wacky humor helps. 


Thursday, March 31, 2011

Paper Mache Easter Eggs!

A week or so ago a phone book appeared on our doorstep. The interwebs are rife with "how to opt out" posts, but I forgot. A friend sent me a link (which I have lost, typical) full of reuse/upcycling ideas for phone books. The one that really excited me? Paper mache!

First you get to take out all your forgot to opt out frustrations on the phone book by ripping it into long strips. Don't cut, rough edges blend better. Then you need a balloon, some flour, water, a tolerance for messiness, and patience.

Flour & water are mixed here. Tolerance & patience not pictured
Basically your paste is flour and water mixed until it's soupy. I like it the consistency of Elmer's glue, but I don't think it matters too much. I actually added a glop of Elmer's to give it a little extra stickiness.

Some people use a paint brush or basting brush to apply the glue. But why? Fingers work way better. So you slather on the paper strips on the balloon this way and that, overlapping, going different directions, covering them completely with the paste, until your whole balloon is covered.
Then you let it dry.
Then you add another layer.
And then you let it dry.
And then you add another layer.
Etc. etc. etc.

I did 4 layers. 
Then you can pop the balloon, if you've left the nozzle end uncovered. If not, no harm done. It's just kind of fun to hear the balloon deflating in there.

Then you paint! I used leftover wall paint, plus some dollar store acrylic paints we had stashed in the closet.
Easter Egg!
I think I may have found a new addiction. Paper mache is awesome.


Saturday, February 26, 2011

Thrifty Minute

Just a quick couple of pics of another thrift craft project. Took a muumuu, made it new-new.
Before


After

Tuesday, February 22, 2011

Nifty, Thrifty, and Counter Cultural

I woke up this morning ready to tell you why you should shop at thrift stores and consignment shops rather than buy new. But I don't have to, because even if you don't know already, other writers have exhausted the topic all over the interwebs.

If you'd like some basics:
Want to Be Eco-Friendly? Visit a Thrift Store
Green Shopping: Don't Say 'Eww' to Thrift Stores

For some reason, there's this cultural aversion to buying at thrift stores. The advent of the consignment shop seems to be alleviating this some, but as a culture we have a long way to go. People seem to think there's something shameful or nasty about buying used.

I say ABSURD!  :D

Some points to ponder:

  • The minute I wear something, it's used. If I don't want to wear used clothing, I might as well start throwing every outfit away after the first wear.
  • Anyone can walk into a department store and put on what the headless mannequin is modeling. It takes creativity and ingenuity to create new outfits from thrift/consignment stores. Would I rather be a dummy or a designer?
  • The creative possibilities are endless at the thrift shop, you aren't hemmed in (pun!) by this year's soon to be out of style fashion. I have a plethora of eras/designers/styles/sizes to choose from. Just wait until you see the amazing 1960's polyester dress I'm getting ready to turn into throw pillows!
  • While shopping can be an utterly depressing endeavor  because of the expense and the fit of clothing (at least, if you're me it can be), thrift shopping is an exciting adventure. I'm not constrained by price or love handles. If I can imagine it, I can make it. At the thrift store, I conform the clothes to my body, rather than agonizing over how my body doesn't conform to the standard. 


Yesterday I showed you the swegwarmers I made out of a thrift store sweater. I plan on using a bit of ribbon to finish off the sleeve holes of that same sweater and turn it into a little hooded vest for Girl 1.

 I spent 2 dollars on that sweater at the thrift store. A quick Google for legwarmers shows that they cost anywhere from $5-$32 (what?!?) a pair. While Google did find a used girls hooded sweater vest for $3.99, most cost $16-$20. One thrift store purchase and I saved $6.99-$50.00. 

Adorable clothes, cheap prices, low carbon footprint, and I'm keeping textile waste out of the landfill?

Skadoosh!


Monday, February 21, 2011

What Else Can I Do With That? - Swegwarmers!

It has been three weeks since I've posted. I haven't felt inspired. While I'm still keepin' it green, there hasn't been much new to report. I've been thinking on the REpUrpoSE line, and "percolating" (this involves a lot of brainstorming, net-surfing, and swirling around of ideas while I lie in bed at night or mindlessly click away at Zuma Blitz).

The Man seems a little worried that I might be turning into a hoarder. I can't seem to throw away anything that could possibly maybe have the slightest itty bitty chance of becoming something else later. We have cans, jars, containers, and plastic bags coming out our ears. I have piles of clothes with little stains that I might be able to cut apart and sew later. My motto is becoming, "What else can I do with that?"

The difference between hoarding and repurposing is actually making stuff.

It's time to get a-craftin'.

Stripey goodness


So for my first attempt, something easy. I've been wanting a pair of leg warmers to wear with skinny jeans and heels. However since I rarely wear heels, I didn't want to spend the money to buy a pair that might not get worn before they go out of style and back to the 80's from whence they came. However, a thrift store sweater with striped sleeves and little button detailing on the cuffs? Hmm...


Cutting lazy-style.
I cut the sleeves off the sweater, leaving the hem on the sleeve side, so they wouldn't ravel and I wouldn't have to sew.


The nice thing about leg warmers (other than the total adorbs-ness and warmy goodness) is they bunch up, so I could roll under the cut edge. It won't fray, but it looks cleaner if you roll it under.


Sleeves sans-sweater

Rotated and saved this 5 times. It still won't stay. Wha?


All that's left to do is put them on over a pair of skinny jeans and heels. Voila!


Friday, January 28, 2011

Let's make stuff

I find this exciting and beautiful, and now have an irresistible urge to start gluing plastic together.


One Plastic Beach from Tess Thackara on Vimeo.

h/t Yes! Magazine

Thursday, January 27, 2011

Vertiginous Veggies

I'm looking forward to spring and summer, so that I can improve our eating locally and seasonally. I'm also excited to start a garden. I've never really had a garden before. Our first home had some raised beds so I decided to plant onions. I forgot all about them and the neighborhood cats used the bed for a litter box. So that was a failure.

This house has a tiny back yard, a tiny front yard, and nearly no sunlight. In my research I'm discovering that nearly all veggies need full sun. This poses some problems. We've talked about giant ceramic pots, vertical potato farming, edible landscaping...

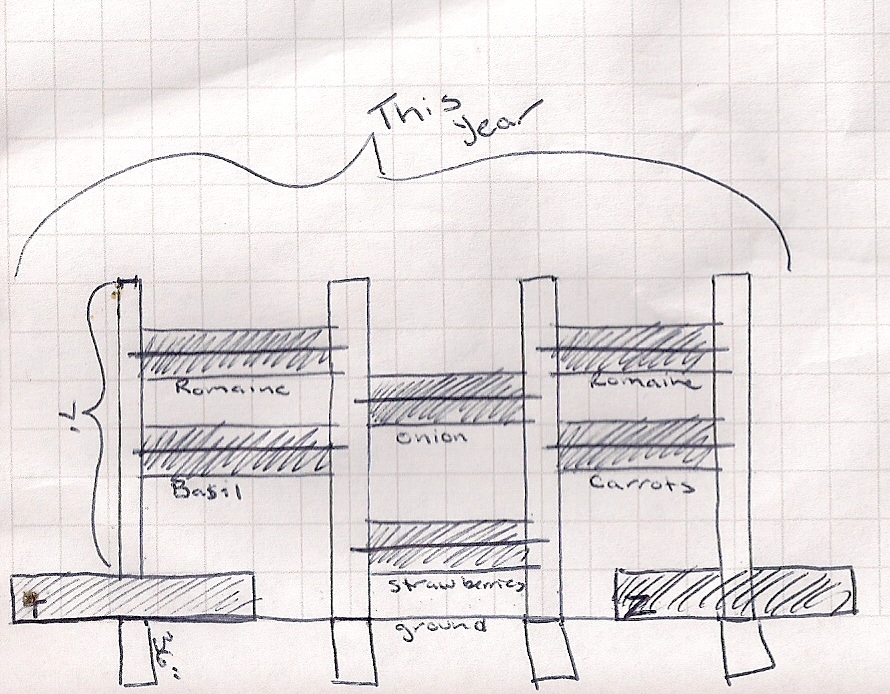
And what we have settled on is a Living Wall. We have a strip of grass between our driveway and the driveway of the house next door. It is 4' x 27', and right now it's home to a bunch of dead grass. It gets sun nearly all day long, it's the only place on our property that does. The nice thing about a living wall is, we can start with a few posts, and add more if it seems to be going well. This year we are going to do 4 posts, but we have room to add 2 more. I spent all morning trying to graph the thing, and this is what I think we're going to do:


No wonder I failed handwriting every year as a kid. 
It's tiny, and hard to read, but basically the two beds that sit on the ground will have tomatoes (on the south end) and zucchini (on the north end). I'm going to try romaine, basil, strawberries, carrots, and onions this year in the raised beds. Hopefully no cats feel frisky enough to climb the thing and "fertilize" it.

I'm a little nervous about this, since I really have no clue what I'm doing. I'm going to run my plan by someone with some know how when I go to buy seeds/sets...hopefully I don't get laughed out of the store.